To enable the required Google API functionality for to the Google Calendar please follow the instruction below. First of all, it must logon in with an existing account to https://console.cloud.google.com or create a new one.
After successful login, you will see the API Manager – Dashboard her you could find a quick overview of usage statistics and a list of all enabled API’s for your account.
To enabled a new API for the account please click on “Enabled Apis and Services” you could than search for “Google Calendar API” and add it to the list of enabled APIs.
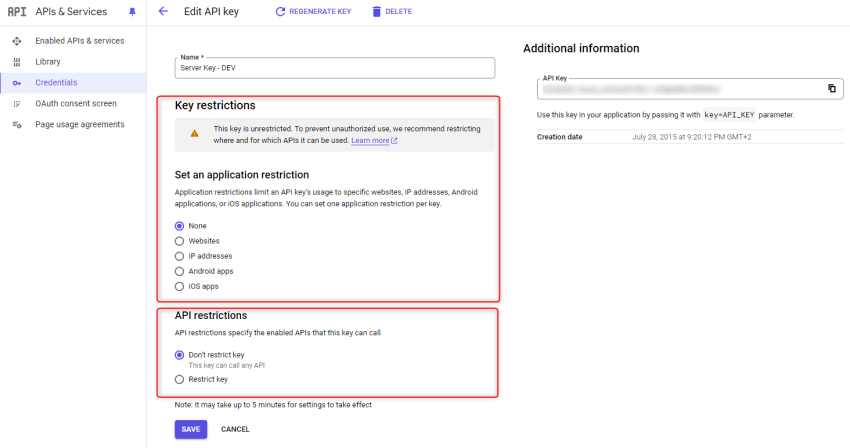
After you’ve added the “Google Calendar API” you also might need to add a new credentials (API-Key) to start using it. Please navigate to “Credentials” the navigation on the left side you should than find an overview of your authentication methods there.
If you do not yet have an API-Key yet, you should create a new key via “+ Create credantials” within the dropdown chose “API key” a new key will be automatically generated. We will then continue with with restricting the key to prevent unauthorized use.
Within the credentials details you could set a Name for management purposes but much more important you could give the key a restriction. For the usage with Easy GCcalendar you could chose IP addresses cause the communication of the component with the api will be handeld in the background from server to server. You can also limit the key to specific apis to prevent from unallowed usage.


Leave A Comment