The Documentation Page provide you with all informations for about our Joomla extensions.
Please select one of the below categories to browse the right extension.
Download the latest version from this website and go to your extension manager within your joomla administration site. Select the .zip archive an click Upload & Install (If you want to proceed a update follow the same instructions)
Easy GCalendar use Google Calendar to display events from a public calendar. Google Calendar can serve as a backend that manages and persistently stores event data.
You must first have a Google Calendar API Key
If you haven’t set an API Key for the calendar yet go to the Google Developer Console and follow the instructions from the FAQ under Google API – Enable Google Caledar API via API Manager.
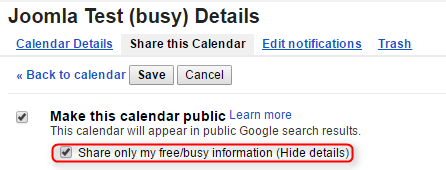
Make your Google Calendar public
- In the Google Calendar interface, locate the “My calendars” on the left.
- Hover over the calendar you would like to use and click the downward arrow.
- A menu will appear. Click “Share this Calendar”.
- Check “Make this calendar public”.
- Make sure “Share only my free/busy information” is unchecked.
- Click “Save”.
Obtain your Google Calendar’s ID
- In the Google Calendar interface, locate the “My calendars” area on the left.
- Hover over the calendar you would like to use and click the downward arrow.
- A menu will appear. Click “Calendar settings”.
- In the “Calendar Address” section of the screen, you will see your Calendar ID. It will look something like “abcd1234@group.calendar.google.com”.
To enable the required Google API functionality for to the Google Calendar please follow the instruction below. First of all, it must logon in with an existing account to https://console.cloud.google.com or create a new one.
After successful login, you will see the API Manager – Dashboard her you could find a quick overview of usage statistics and a list of all enabled API’s for your account.
To enabled a new API for the account please click on “Enabled Apis and Services” you could than search for “Google Calendar API” and add it to the list of enabled APIs.

After you’ve added the “Google Calendar API” you also might need to add a new credentials (API-Key) to start using it. Please navigate to “Credentials” the navigation on the left side you should than find an overview of your authentication methods there.

If you do not yet have an API-Key yet, you should create a new key via “+ Create credantials” within the dropdown chose “API key” a new key will be automatically generated. We will then continue with with restricting the key to prevent unauthorized use.
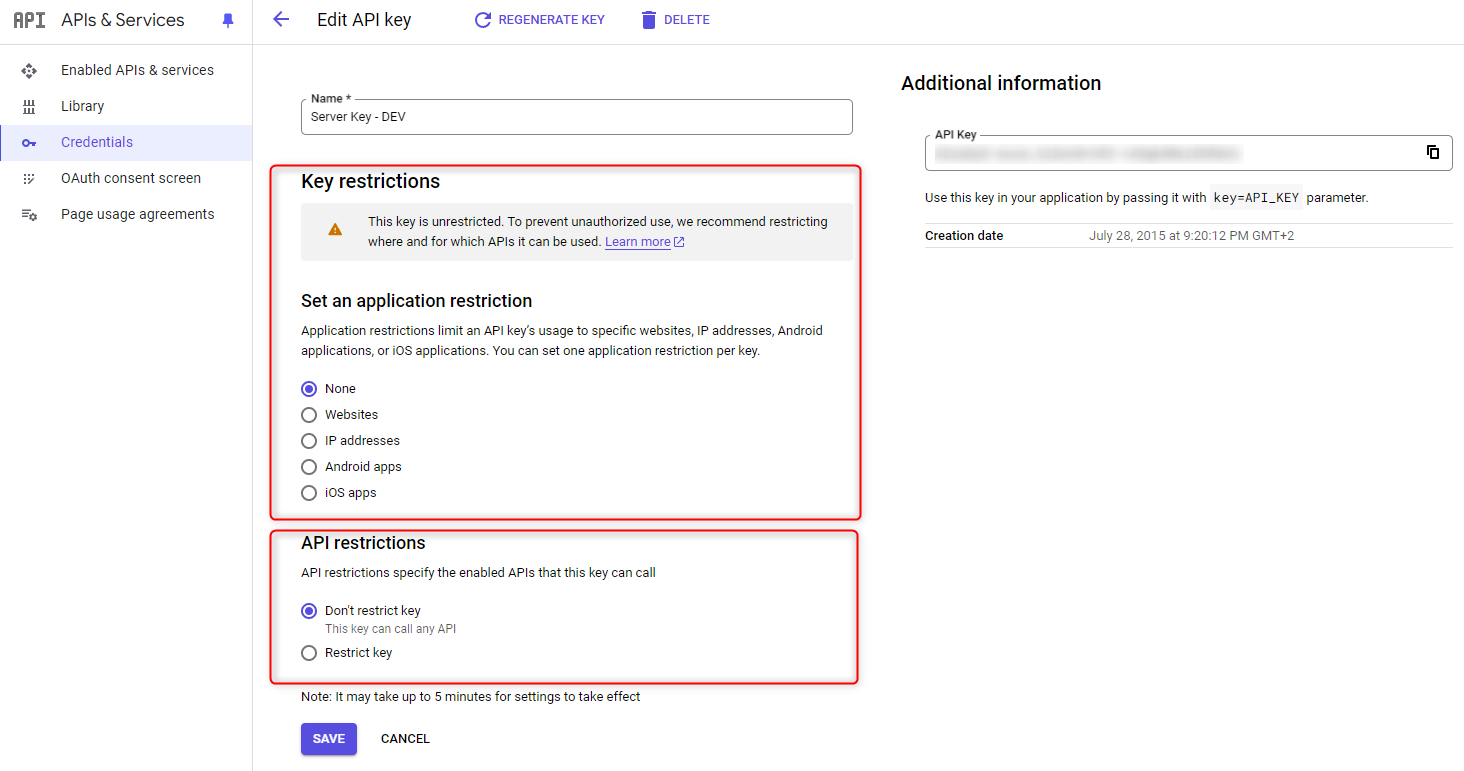
Within the credentials details you could set a Name for management purposes but much more important you could give the key a restriction. For the usage with Easy GCcalendar you could chose IP addresses cause the communication of the component with the api will be handeld in the background from server to server. You can also limit the key to specific apis to prevent from unallowed usage.

Easy GCalendar use Google Calendar to display events from a public calendar.
In some cases it might be useful to double-check if you could reach the API from your System / Browser, keep also in mind that the access of the API is maybe restricted e.g. to a specific IP-Address or HTTP referer (Setup this via https://console.cloud.google.com).
Replace [YourCalendarId] with your Calendar ID from Google Calendar and the [KEY] with your Google Developer API Key (Double-check if there are any access restrictions for this key).
Sample URL: https://www.googleapis.com/calendar/v3/calendars/[YourCalendarId]/events?key=[KEY]
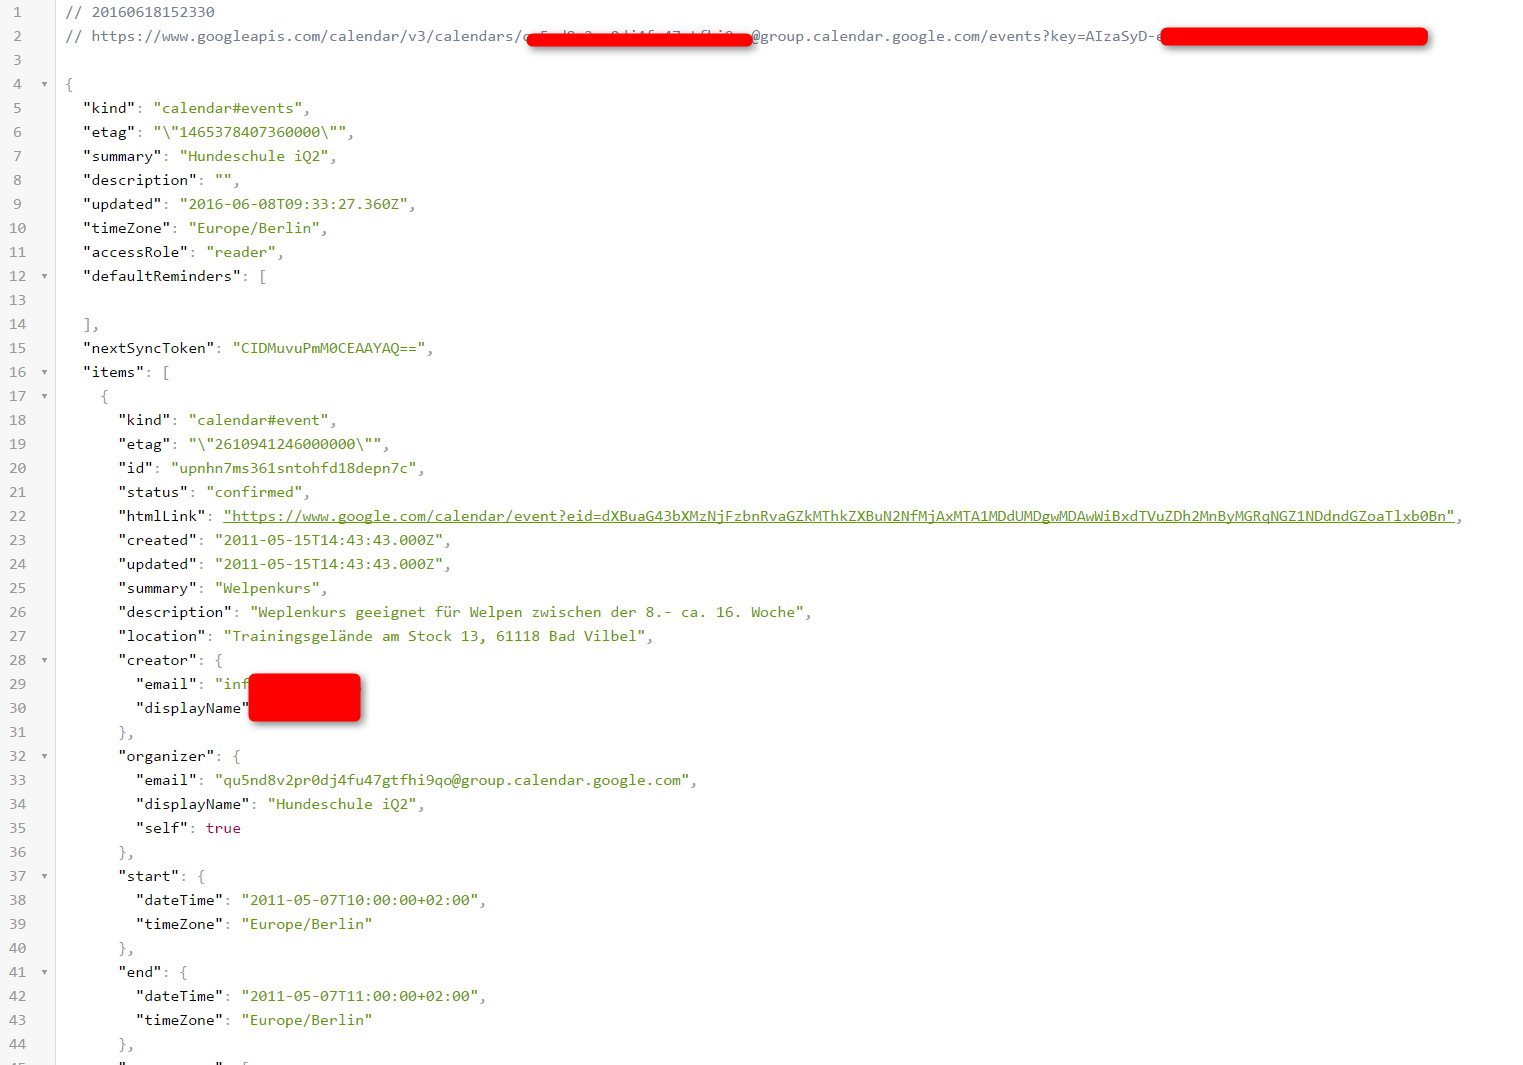
Sample Google API call JSON response for the calendar.
With version 1.2.3 Easy Calendar has added the support to define an seperate Google JavaScript API-Key.
This will allow you to use the Google-Maps within the Event details view otherwise you will receive an error message, cause Google has deactivate the public usage of Maps without a valid API-Key.
The API-Key could be easily set within the component global settings in the Maps Tab (see screenshot below).

Install the extension
Download the latest version of the Easy GCalendar. Next, go to your Joomla backend administration area and install it via Extensions -> Install/Uninstall.
Now all required extensions of Easy GCalendar are installed.
Set your timezone
In your Joomla Global Server settings, change the time zone to your timezone. The timezone you set is important to display the calendar items in the right timezone within the calendar.
Setup your first calendar
Before we can display results on the Site it is necessary to setup at least 1 or more Goolge Calendar entries within the Administration that could than used later on within the component & modules.
- Click on Components > Easy GCalendar > Calendars
- Click on New Button
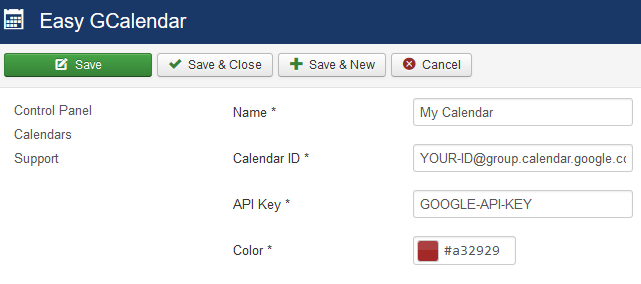
- Fill out the form completely
- Click on Save & Close Button
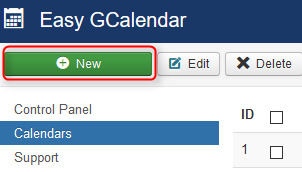
If everything was successfully you should now see your newly created calendar listed within the list:

Setup your calendar site
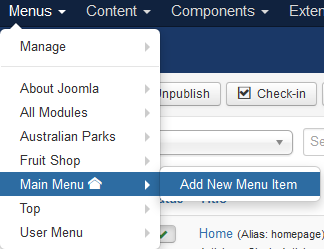
- Click on Menus > Main Menu > Components > Add New Menu Item
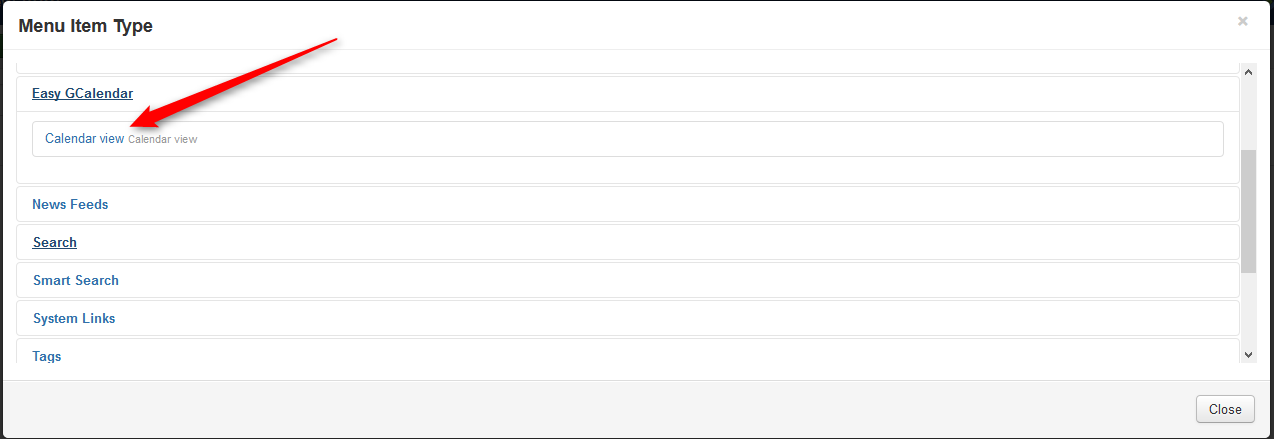
- Select “Easy GCalendar > Calendar view” from Menu Item Type selection possibilities.
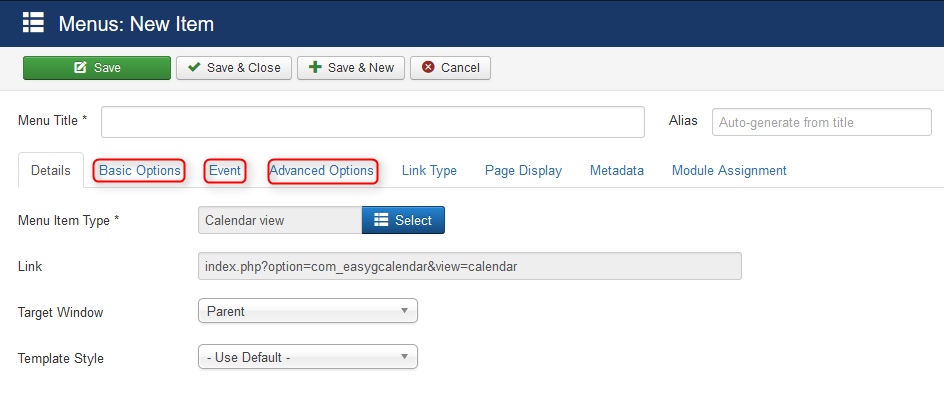
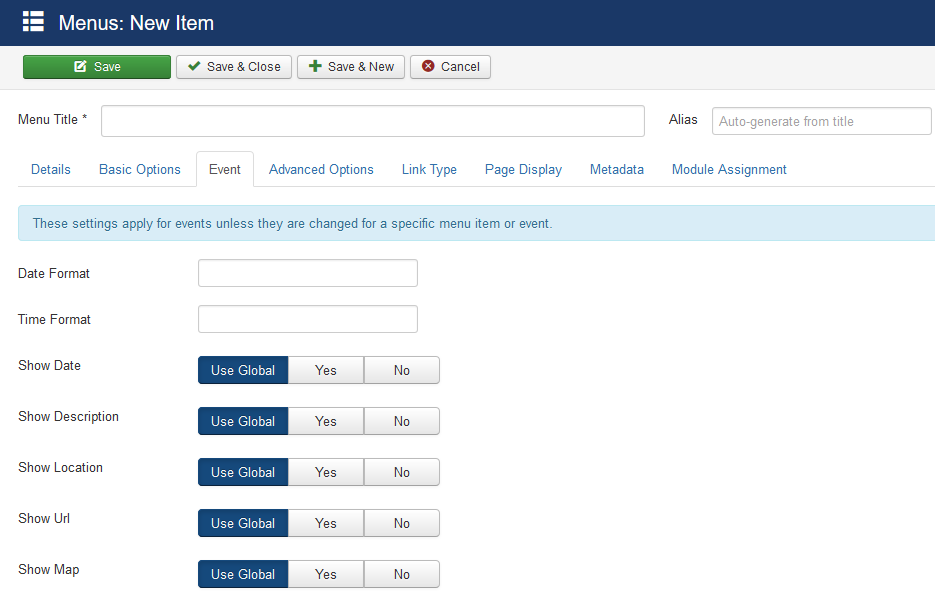
After the item type selection you will see the following screen all the red marked tabs contains configuration possibilities to customize the Easy Calendar:
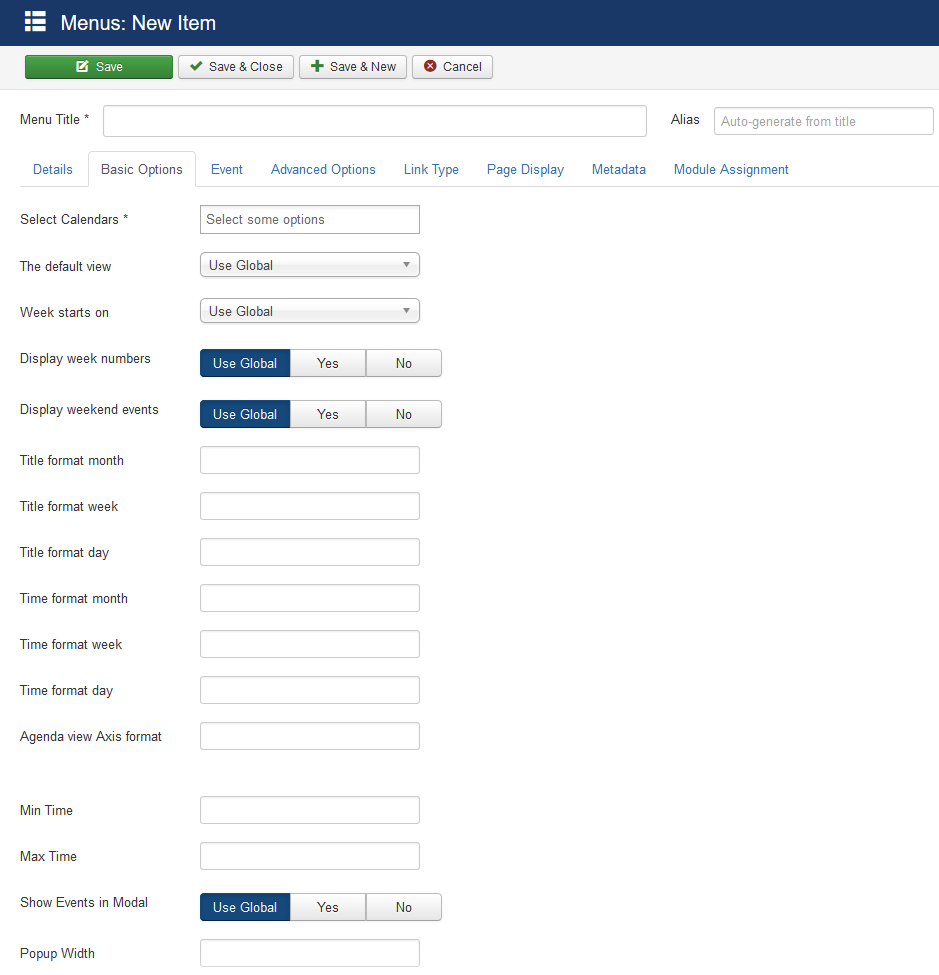
The “Basic Options” Tab contains the configuration possibility to customize the the calendar view:
The “Event” Tab contains all possible options to configure the event details view:
Finally, you should now save the new entry by clicking on the “Save & Close” button!
Within the Easy GCalendar settings you could switch between different frontend Frameworks that is quite useful if you use as example a template that is based on Bootstrap 5.
The Component currently supports the following Frontend Frameworks for Joomla 4+:
- Bootstrap 5
For the lagacy Joomal 3.x:
- Bootstrap 2 (Joomla 3.x builtin)
- Bootstrap 3

With version 1.2.0 Easy Calendar we have added the support of a new filter option for the calendar. This filter give you the possibility to select between the selected calendars from the backend and will than only display selected calendar events.


If you like to use a calendar that has events that should not display any details like title, description or location cause of privacy restrictions you could do this by enabling the relevant setting within the Google calendar event settings.
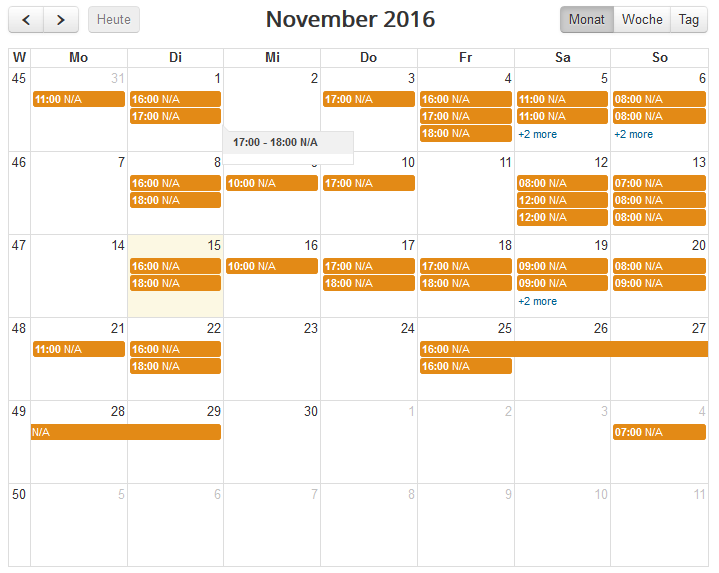
The displayed text could be customized within the translations.
With version 2.0.6 EasyImage Rotator we have added support for responsive images and bootstrap 3 layouts. The new responsive mode is enabled by default und should work with single image and Image Slider setups.
Please be aware of the responsive mode does not work together with corping images that will be disabled aoutmaticaly if the responsive mode is enabled!


The image root is your joomla website from that you can specifie every relative path your want e.g. mages/sampledata/fruitshop/* or images/banners/test.png
NO this is currently not possible.